When it comes to creating a high-performance pickleball court, the flooring you choose sets the foundation for every rally and serve. The rise of PVC sports flooring has transformed the game, offering unmatched comfort, safety, and resilience for both recreational and professional players. Unlike rigid tile-based systems, roll-type PVC flooring delivers a seamless surface that enhances player movement while minimizing joint impact.
This guide brings you expert tips on installing and maintaining your pickleball floor, ensuring that your court remains smooth, safe, and ready for play all year round. Whether you’re setting up a new facility or upgrading an existing one, understanding the right techniques can extend the lifespan of your PVC sports flooring and elevate your playing experience.
Understanding PVC Sports Flooring for Pickleball
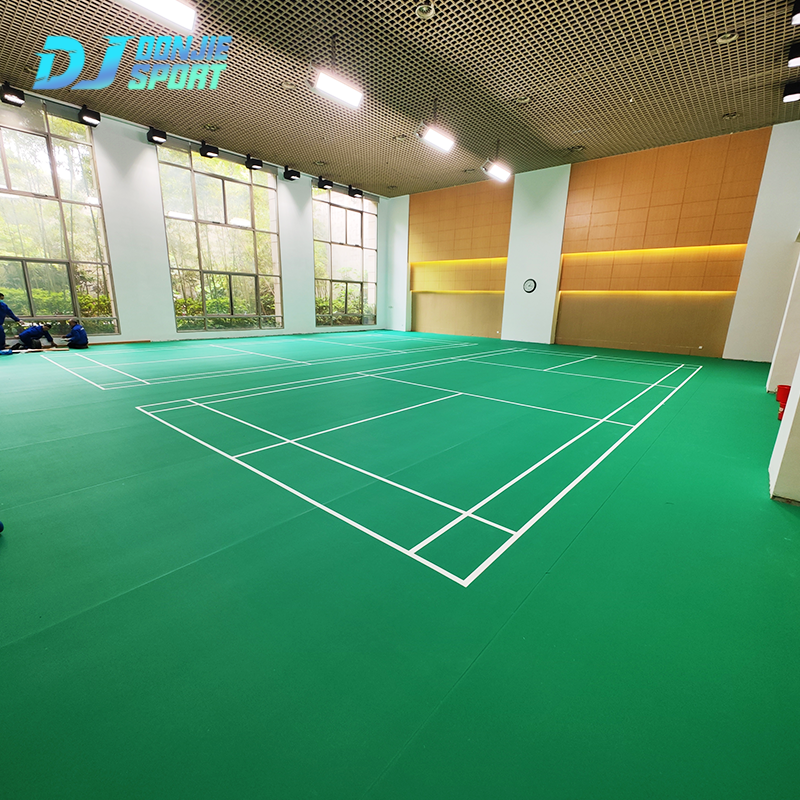
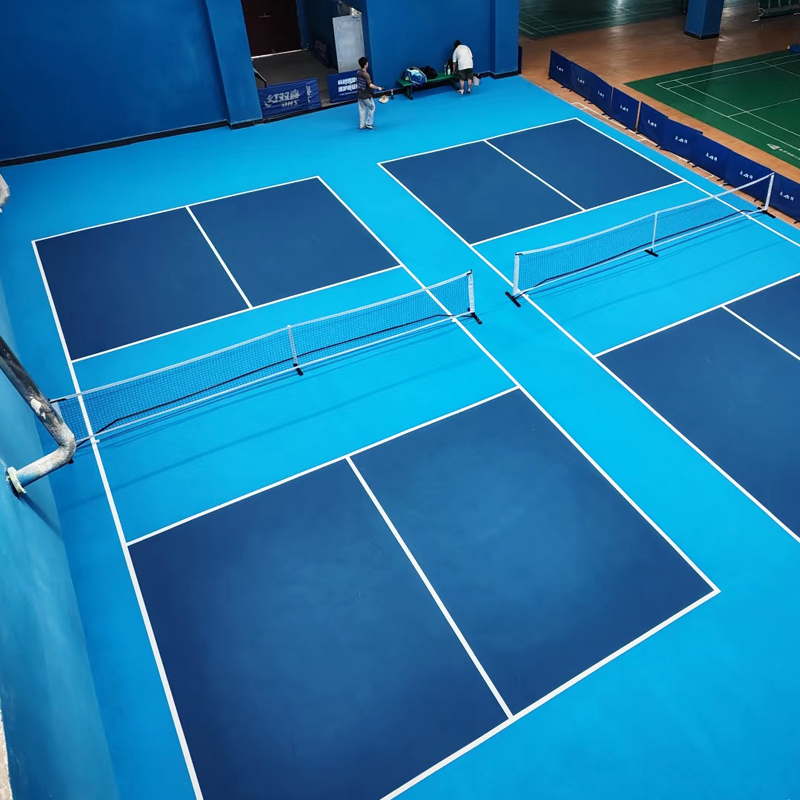
PVC sports flooring has become a top choice for pickleball facilities due to its balance of comfort, performance, and easy maintenance. Unlike traditional hardwood or concrete, PVC flooring rolls provide excellent elasticity, making it ideal for absorbing impact and reducing player fatigue. The layered structure—typically composed of a wear-resistant top layer, a glass fiber reinforced middle layer, and a foam cushioned base—ensures long-term stability and safety.
For pickleball specifically, these features make a world of difference. The surface offers consistent ball bounce and excellent traction, allowing players to move confidently without the risk of slipping. Furthermore, the PVC sports flooring roll format simplifies installation, offering seamless coverage that enhances aesthetics and performance alike.
Preparing for Installation of PVC Sports Flooring
Before laying your PVC sports flooring, proper preparation is the key to a successful installation. Start by evaluating the subfloor — it must be flat, dry, and free of dust or oil. Uneven or damp foundations can compromise adhesion and cause future issues such as bubbling or cracking. If you’re converting an old surface, make sure all previous coatings or adhesives are fully removed.
Environmental conditions also play a critical role. Maintain a stable indoor temperature (between 18–25°C) and relative humidity (around 50–65%) before and during installation. This allows the PVC flooring rolls to acclimate properly, preventing expansion or shrinkage after installation.
Prepare essential tools such as a trowel, seam cutter, roller, adhesive, and moisture meter. Having everything ready before you begin ensures a smoother workflow and more precise results.
Step-by-Step Guide to Installing PVC Sports Flooring
Step 1: Subfloor Preparation
Begin by leveling the concrete base. Use a moisture meter to confirm that humidity levels meet manufacturer recommendations (typically below 3%). Fill cracks or holes using a leveling compound for a perfectly even surface.
Step 2: Flooring Layout and Cutting
Unroll the PVC sports flooring and allow it to rest for at least 24 hours to adapt to the environment. Then, align each roll according to your court layout, making sure the seams face away from the direction of play. Trim the edges using a precision knife for a clean fit.
Step 3: Adhesive Application
Apply a suitable PVC adhesive evenly using a notched trowel. Avoid overusing glue, as it may cause bubbling. Press the flooring down carefully, ensuring complete contact between the adhesive and the backing layer.
Step 4: Seam Joining and Flattening
After laying down the rolls, use a seam welding technique (cold or hot welding depending on manufacturer recommendations) to create seamless joints. Then, roll the entire surface using a 50–70 kg heavy roller to eliminate air bubbles and improve bonding.
Step 5: Curing and Final Inspection
Allow the floor to cure for 24–48 hours before walking or playing on it. Inspect for any lifting, gaps, or uneven sections. A proper final check ensures long-lasting performance and appearance.
Common Installation Mistakes and How to Avoid Them
Even small mistakes during installation can affect the court’s quality. Avoid the following pitfalls:
-
Ignoring subfloor imperfections: Every bump or dip will show through the PVC roll, affecting gameplay.
-
Using the wrong adhesive: Always select an adhesive compatible with PVC sports flooring and environmental conditions.
-
Skipping acclimation: Installing cold or unacclimated flooring may lead to shrinkage or stretching after installation.
-
Inadequate rolling pressure: Failing to remove trapped air can create bubbles and unevenness.
Careful preparation and patience are key to achieving a professional-level pickleball surface.
Essential Maintenance Tips for PVC Sports Flooring
Once your pickleball court is installed, maintenance determines how well it performs over time. PVC sports flooring requires consistent but simple care routines to keep it looking and functioning like new.
Daily Care: Use a soft dust mop or vacuum to remove dirt and grit that could cause scratches.
Weekly Cleaning: Damp mop the surface using neutral pH cleaners designed for PVC flooring. Avoid bleach or solvent-based solutions, as they can dull the finish.
Preventative Measures: Place mats at entrances to reduce dust, and use soft-soled shoes to minimize wear. Always lift heavy equipment instead of dragging it across the surface.
Periodic Deep Cleaning: Every few months, consider a professional deep cleaning to restore the flooring’s anti-slip properties and shine.
Long-Term Care: Extending the Life of Your Pickleball Court
To maintain performance and visual appeal, create a structured maintenance schedule:
-
Recoat or re-weld seams every few years if signs of wear appear.
-
Inspect regularly for cracks, discoloration, or adhesive weakening.
-
Avoid excessive moisture, which can seep beneath seams and damage the base layer.
-
Control temperature within a consistent range to prevent expansion or contraction.
By following these simple yet effective strategies, your PVC sports flooring can last up to 10–15 years while maintaining its professional-level quality.
Troubleshooting Common Flooring Issues
Even with proper care, some minor issues may occur over time. Here’s how to address them:
-
Small bubbles or raised edges: Use a heat gun and roller to gently press them down. If they persist, reapply adhesive locally.
-
Seam separation: Clean the area thoroughly and use a cold welding compound for quick repair.
-
Surface scuffs or scratches: Apply a specialized PVC polish to restore gloss and protection.
If larger sections are damaged, it’s best to contact a professional for patching or resurfacing to maintain the court’s integrity.

Eco-Friendly Practices in PVC Sports Flooring Maintenance
Sustainability is increasingly important for modern sports facilities. With PVC sports flooring, you can adopt several eco-friendly practices:
-
Use biodegradable or low-VOC cleaning products to reduce chemical emissions.
-
Recycle old PVC flooring rolls through certified programs rather than sending them to landfills.
-
Choose energy-efficient installation methods, such as solvent-free adhesives, for greener operations.
These actions not only reduce your environmental footprint but also enhance your facility’s reputation as a responsible, modern sports venue.
Ensuring Performance and Longevity
Installing and maintaining PVC sports flooring for your pickleball court is an investment in safety, performance, and player satisfaction. From preparing a solid foundation to executing a flawless installation and adopting a consistent maintenance routine, every step contributes to creating a durable and comfortable court environment.
By following these expert insights, facility owners and installers can ensure that their pickleball floors remain in top condition — delivering the perfect combination of resilience, comfort, and playability for years to come.