Indoor pickleball courts require careful planning of materials, strict adherence to construction processes, and regular maintenance to ensure optimal playability and longevity. Below is a detailed breakdown based on your specified requirements.
1. Selection of Flooring Materials
The choice of flooring directly impacts the court’s shock absorption, traction, durability, and cost. Here’s a comparison of the three recommended materials to help you make an informed decision:

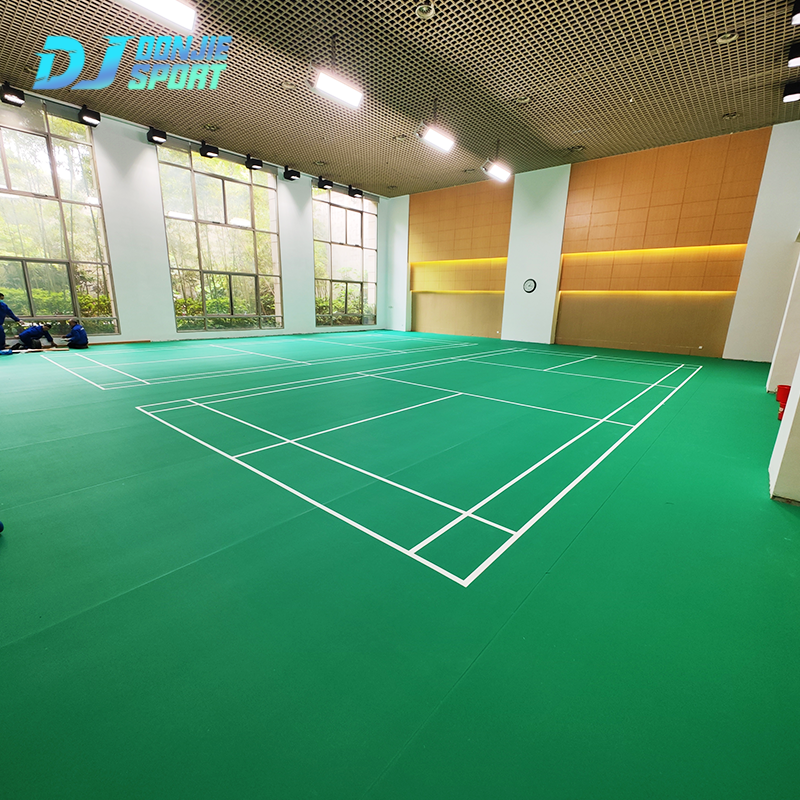
1.1 PVC Sports Flooring
- Core Advantages: Excellent shock absorption (reduces joint strain for players), high slip resistance (even when slightly damp), and good wear resistance. It also has a smooth surface that allows pickleballs to bounce consistently, meeting official play standards.
- Key Features: Lightweight, easy to cut and fit (suitable for irregular indoor spaces), and available in standard pickleball court colors (e.g., blue, green with white boundary lines). It’s also relatively low-cost compared to wooden flooring.
- Suitable Scenarios: Community centers, home courts, or recreational facilities with moderate usage (2–4 hours of daily play).

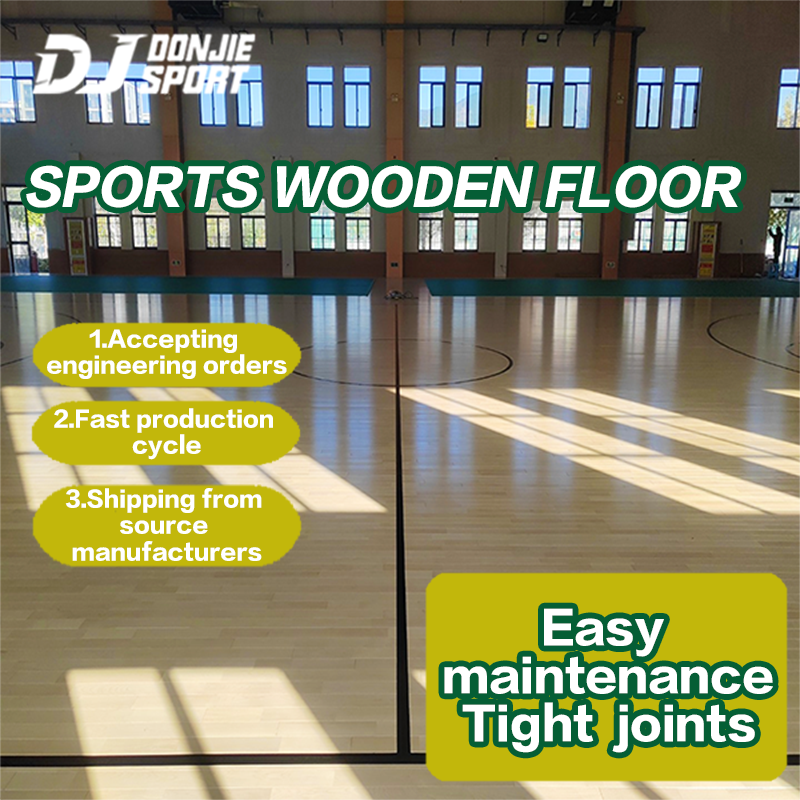
1.2 Wooden Sports Flooring
- Core Advantages: Offers a premium, professional feel with natural elasticity—ideal for high-level players or competitive venues. It has exceptional durability (can last 15–20 years with proper maintenance) and a classic appearance that enhances the venue’s aesthetics.
- Key Features: Typically made of solid hardwood (e.g., maple, oak) or engineered wood. Requires a stable subfloor (to prevent warping) and professional installation (sanding, sealing, and line painting).
- Suitable Scenarios: Professional clubs, gymnasiums, or commercial facilities with high usage (5+ hours of daily play) and a focus on premium user experience.
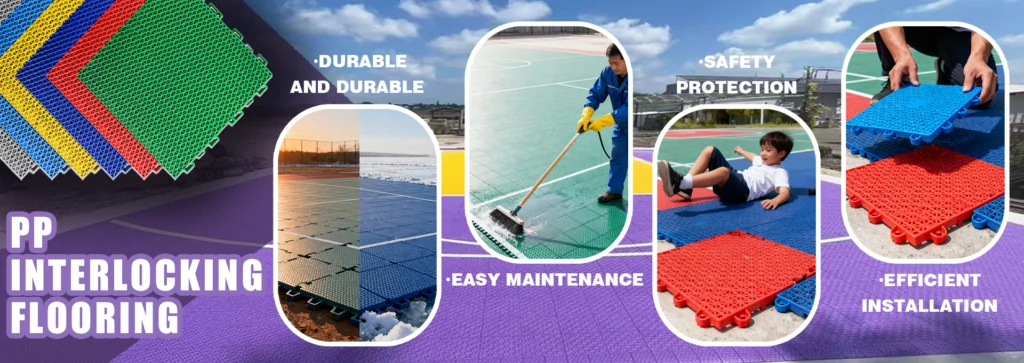
1.3 PP Suspended Sports Flooring
- Core Advantages: Modular design (interlocking tiles) for quick installation and disassembly—perfect for temporary courts or spaces that need multi-purpose use (e.g., converting a gym into a pickleball court). It has good drainage (suitable for slightly humid areas) and is resistant to impact.
- Key Features: Lightweight (each tile weighs 1–2 kg), easy to clean, and available in bright colors. However, its bounce consistency is slightly lower than PVC or wooden flooring, making it more suitable for recreational play.
- Suitable Scenarios: Schools, temporary event venues, or home courts where flexibility is a priority.
2. Construction Method and Process
Regardless of the flooring material, the construction process follows three core stages: pre-construction preparation, flooring installation, and post-installation finishing. Below is a detailed step-by-step guide:
2.1 Pre-Construction Preparation (1–2 Days)
This stage is critical to ensuring smooth installation and avoiding future issues (e.g., uneven flooring, warping).
- Step 1: Measure and Mark the Court
The official indoor pickleball court size is 20 feet (width) × 44 feet (length) (including the non-volley zone, service line, and boundary lines). Use a tape measure, chalk line, and level to mark the court area on the indoor floor. Ensure the area is square (diagonals should be equal) and free of obstacles (e.g., pillars, vents).
- Step 2: Prepare the Subfloor
The subfloor must be flat, clean, and dry (moisture content ≤ 6% for wooden flooring; ≤ 8% for PVC/PP flooring).
- For concrete subfloors: Fill cracks or uneven areas with concrete repair mortar, then sand the surface to remove dust and debris.
- For wooden subfloors: Check for loose boards, replace damaged ones, and sand to level the surface. Install a vapor barrier (e.g., plastic sheeting) if the subfloor is prone to moisture.
- Step 3: Gather Tools and Materials
Prepare tools based on the flooring type:
- PVC flooring: Utility knife, tape measure, chalk line, double-sided adhesive tape, or flooring glue.
- Wooden flooring: Nail gun, sander, wood glue, tape measure, chalk line, and boundary line paint (acrylic-based).
- PP suspended flooring: Rubber mallet (for locking tiles), tape measure, chalk line, and edge trim (to cover exposed tile edges).
2.2 Flooring Installation (2–3 Days)
2.2.1 PVC Sports Flooring Installation
- Step 1: Lay the Underlayment (Optional but Recommended)
Install a foam underlayment (3–5 mm thick) to enhance shock absorption and reduce noise. Cut the underlayment to fit the court area and tape the seams with waterproof tape.
- Step 2: Install the PVC Flooring
Roll out the PVC flooring (if using sheet-type) or lay individual PVC tiles (if using modular type) along the chalk lines. For sheet-type PVC: Leave a 5–10 mm gap between the flooring and the wall (to account for thermal expansion), then cut the excess with a utility knife. Secure the flooring with double-sided adhesive tape (for temporary use) or flooring glue (for permanent use). For modular PVC tiles: Interlock the tiles using the built-in locking system, then press firmly to ensure a tight fit.
- Step 3: Seal the Seams
Use PVC seam sealer to fill gaps between tiles/sheets, then wipe off excess sealer with a damp cloth. Allow the sealer to dry for 24 hours.
2.2.2 Wooden Sports Flooring Installation
- Step 1: Install the Subfloor Sheathing (If Needed)
For concrete subfloors, install a layer of plywood (18–22 mm thick) using screws (spaced 12–16 inches apart) to create a stable base for the hardwood.
- Step 2: Lay the Hardwood Flooring
Start laying the hardwood planks along the longest wall of the court. Use wood glue to bond the planks together, then secure them to the subfloor with a nail gun (nails should be 2–3 inches long, spaced 8–10 inches apart). Leave a 10–15 mm gap between the planks and the wall (for expansion). Stagger the seams of adjacent rows (to enhance stability) by at least 6 inches.
- Step 3: Sand and Finish the Flooring
After the glue dries (24–48 hours), use a floor sander to smooth the surface (start with 80-grit sandpaper, then 120-grit). Vacuum the dust, then apply 2–3 coats of polyurethane finish (water-based for low odor, oil-based for higher durability). Allow each coat to dry for 4–6 hours before applying the next.
2.2.3 PP Suspended Sports Flooring Installation
- Step 1: Lay the First Row of Tiles
Start at the corner of the marked court area. Place the first PP tile on the chalk line, then interlock the next tile by aligning the grooves and pressing down firmly (use a rubber mallet if needed). Continue laying tiles along the first row until the end of the court.
- Step 2: Install Subsequent Rows
For the second row, interlock the tiles with both the first row and the adjacent tile in the same row. Ensure the tiles are aligned with the chalk lines to maintain the court’s shape. Cut tiles at the edges of the court (using a utility knife) to fit irregular spaces.
- Step 3: Add Edge Trim
Attach PP edge trim to the exposed edges of the court (e.g., along walls or walkways) using screws or adhesive. This prevents tripping and protects the tiles from damage.
2.3 Post-Installation Finishing (1 Day)
- Step 1: Paint Boundary Lines
Use acrylic-based sports paint (white, 2 inches wide) to mark the official pickleball lines: non-volley zone (7 feet from the net), service line (10 feet from the net), and boundary lines. Use painter’s tape to ensure straight lines, then remove the tape immediately after painting. Allow the paint to dry for 8–12 hours (avoid foot traffic during this time).
- Step 2: Install the Net
Mount pickleball net posts (adjustable height, 36 inches at the posts, 34 inches in the center) on both sides of the court (22 feet apart, aligned with the center line). Attach the net to the posts, ensuring it’s tight and level.
- Step 3: Inspect and Test
Walk across the entire court to check for loose tiles/planks or uneven areas. Test the ball bounce (a standard pickleball should bounce 30–36 inches when dropped from 6 feet) to ensure it meets play standards. Make adjustments (e.g., resecuring loose tiles, adding more finish to wooden flooring) as needed.
3. Maintenance Methods
Proper maintenance extends the lifespan of the court and preserves its playability. Below are material-specific maintenance tips:
3.1 PVC Sports Flooring Maintenance
- Daily Maintenance: Sweep the floor with a soft-bristle broom or vacuum (without a beater bar) to remove dust and debris. Mop the floor once a day with a mild detergent (e.g., pH-neutral floor cleaner) and warm water (avoid harsh chemicals like bleach or ammonia, which can damage the surface).
- Weekly Maintenance: Inspect the seams and edges for loose adhesive or damage. Repair small cracks with PVC seam sealer. For stubborn stains (e.g., oil, ink), use a damp cloth with rubbing alcohol to wipe the area (test on a small, hidden spot first).
- Long-Term Maintenance: Every 1–2 years, apply a coat of PVC floor polish to restore shine and enhance wear resistance. Avoid dragging heavy equipment (e.g., gym mats, tables) across the floor—use felt pads under furniture legs.
3.2 Wooden Sports Flooring Maintenance
- Daily Maintenance: Sweep with a soft-bristle broom or vacuum (with a hardwood floor attachment) to prevent scratches from dirt. Wipe up spills immediately with a dry cloth (moisture can cause warping).
- Weekly Maintenance: Mop the floor with a damp (not wet) mop and a pH-neutral hardwood floor cleaner. Avoid using excessive water—dry the floor with a towel after mopping. Inspect for scratches: For minor scratches, use hardwood floor touch-up markers (matching the floor color) to cover them.
- Long-Term Maintenance: Every 3–5 years, sand the floor (120-grit sandpaper) to remove worn finish, then reapply 1–2 coats of polyurethane. Avoid direct sunlight (use curtains or blinds) to prevent fading. Use floor mats at entryways to trap dirt and reduce wear.
3.3 PP Suspended Sports Flooring Maintenance
- Daily Maintenance: Sweep with a soft-bristle broom or vacuum (with a brush attachment) to remove debris. For spills, wipe with a damp cloth—PP tiles are water-resistant, so no need to worry about moisture damage.
- Weekly Maintenance: Remove a few edge tiles to check for debris under the flooring (e.g., dust, small objects). Vacuum the space under the tiles, then reattach the tiles. Inspect the locking system for wear—replace damaged tiles immediately (modular design makes replacement easy).
- Long-Term Maintenance: Every 6–12 months, clean the tiles with a pressure washer (low pressure, 1000–1500 PSI) to remove deep-seated dirt. Avoid using sharp objects (e.g., scissors, nails) on the tiles, as they can puncture the surface. If the court is disassembled for storage, stack tiles flat (no more than 10 tiles high) to prevent warping.
Final Tips
- Safety First: Always wear non-marking athletic shoes on the court (to prevent stains and scratches). Install Anti-slip mats (anti-slip mats) near entryways if the floor is prone to moisture.
- Usage Limits: For wooden flooring, avoid high-heel shoes or heavy equipment (e.g., weights) that can dent the surface. For PP flooring, limit the number of players per court (4–6 people) to reduce stress on the locking system.
- Professional Help: If you’re unsure about installation (e.g., wooden flooring subfloor preparation), hire a professional sports flooring contractor to ensure quality and compliance with official standards.