When it comes to creating the perfect basketball court, the flooring is one of the most important factors to consider. A high-quality basketball parquet floor not only enhances the aesthetic appeal of the court but also contributes to the overall performance and safety of the players. Installing basketball parquet flooring might seem like a daunting task, but with the right approach, it can be done professionally, ensuring a long-lasting, top-tier surface for years of play.
Parquet flooring, a pattern of wood pieces arranged in a distinctive design, is a popular choice for basketball courts due to its durability, sleek look, and shock-absorbing properties. Whether you’re upgrading your gymnasium or building a new court, understanding how to install basketball parquet flooring like a pro is crucial for achieving both functionality and aesthetic appeal. In this comprehensive guide, we’ll walk you through every step of the installation process, from preparation to finishing, ensuring you get the job done efficiently and correctly.
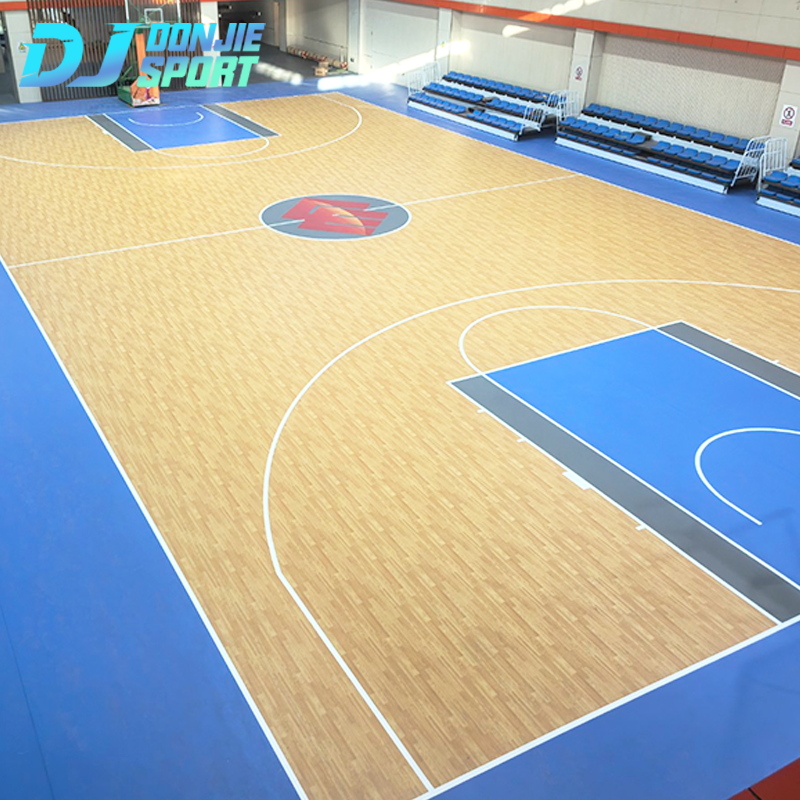
Understanding Basketball Parquet Flooring
Basketball parquet flooring refers to a specific type of hardwood flooring designed for sports courts, particularly basketball courts. It features interlocking wood tiles or strips, typically made from high-quality wood species like maple, which are arranged in various geometric patterns. This type of flooring is highly sought after in professional arenas due to its superior performance and durability.
Why Choose Parquet Flooring for Basketball Courts?
-
Enhanced Performance: The unique arrangement of wood pieces in parquet flooring helps absorb shock and minimize impact during gameplay. This reduces the strain on athletes’ joints and provides a better overall playing experience.
-
Durability: Parquet floors are built to last. Made of high-quality hardwoods, they are resistant to wear and tear, making them ideal for high-traffic environments like sports courts.
-
Aesthetic Appeal: Parquet flooring offers a polished, professional look. The intricate patterns of the tiles give the court a visually striking design, which is important for both aesthetics and branding in professional settings.
-
Low Maintenance: Parquet floors are easy to clean and maintain, keeping your court in top condition without requiring constant upkeep.
While parquet flooring is a popular option for its professional look and feel, it’s important to ensure proper installation for optimal results. Now that we understand what makes basketball parquet flooring such a great choice, let’s look at how to properly install it.
Preparing for the Installation
Before jumping into the installation process, adequate preparation is key to ensuring that the flooring lasts for years without issues. Proper planning and the right tools can make the job much easier and result in a flawless court.
Choosing the Right Parquet Flooring
When selecting your parquet flooring, ensure that it’s designed specifically for basketball courts. Not all parquet floors are created equal; some are more suited for residential use, while others are crafted for high-impact sports environments. Look for features like moisture resistance and shock absorption to improve player safety and performance.
Tools and Materials Needed
To install basketball parquet flooring, you will need the following tools and materials:
-
Parquet tiles (pre-finished or unfinished)
-
Wood adhesive or interlocking flooring system
-
Measuring tape
-
Utility knife or saw for cutting tiles
-
Trowel (for spreading adhesive)
-
Rubber mallet (for tapping tiles into place)
-
Sandpaper or sander (for finishing touches)
-
Protective coating (such as polyurethane)
Measuring the Court Area
Accurate measurements are essential when preparing the floor. Measure the length and width of the basketball court to determine how much parquet flooring you need. It’s important to account for the entire area, including any irregular edges or corners.
Preparing the Subfloor
The subfloor is the foundation for your parquet flooring, so it’s crucial to ensure it’s in excellent condition. Follow these steps to prepare:
-
Inspect the subfloor: Check for any damages, moisture issues, or unevenness.
-
Clean the surface: Remove dirt, dust, and debris to ensure a smooth adhesive bond.
-
Level the subfloor: If there are any dips or bumps, use a leveling compound to smooth them out.
Step-by-Step Guide to Installing Basketball Parquet Flooring
Step 1: Preparing the Subfloor
The first step in installing basketball parquet flooring is ensuring the subfloor is properly prepared. Any imperfections or contaminants can affect the bonding of the parquet tiles, so it’s crucial to make the surface as smooth and clean as possible.
-
Inspect for damage: Make sure the subfloor is stable and in good condition.
-
Clean thoroughly: Sweep, vacuum, and mop the surface to remove all dust and debris.
-
Level the floor: If necessary, use a floor leveling compound to fill in any low spots, ensuring a smooth and even surface.
Step 2: Laying the Parquet Tiles
Once the subfloor is ready, the next step is to lay the parquet tiles. Start by marking the center of the court to ensure that the pattern will be balanced. This helps prevent uneven edges and misalignment.
-
Lay the first tile: Begin in the center and work your way out. Use a chalk line to ensure straight lines and proper alignment.
-
Place the tiles: Lay the tiles in the desired pattern, ensuring each tile fits snugly with the adjacent one.
-
Leave space for expansion: Leave a small gap (around 1/8 inch) between the tiles and the wall to allow for expansion due to changes in temperature and humidity.
Step 3: Cutting Parquet Tiles
It’s likely that some tiles will need to be cut to fit along the edges of the court. Use a utility knife or saw to carefully cut the tiles to the correct size. Be sure to measure and mark the tiles before cutting to ensure accuracy.
-
Use proper cutting tools: A sharp utility knife works best for cutting smaller pieces, while a saw may be necessary for larger cuts.
-
Ensure straight cuts: For clean edges, use a guide or straightedge to guide your cuts.
-
Safety first: Wear protective gloves and goggles when cutting the tiles to avoid injury.
Step 4: Securing the Parquet Tiles
The next step is to secure the parquet tiles to the subfloor. Depending on the type of parquet flooring you are using, you may either apply adhesive or use an interlocking system.
-
Apply adhesive: If you’re using adhesive, spread a thin layer over the subfloor using a trowel. Press each tile firmly into place.
-
Use an interlocking system: If your parquet tiles are interlocking, simply fit the tiles together, ensuring they are tightly locked into place.
Step 5: Finishing the Surface
Once all the tiles are installed, the final step is to finish the surface. This involves sanding the floor to create a smooth finish and applying a protective coating to seal the wood.
-
Sanding: Use a sander or sandpaper to smooth any rough edges and ensure a uniform surface.
-
Applying protective coating: Finish with a polyurethane or varnish to protect the surface from wear and tear. This also enhances the appearance of the parquet floor and makes it easier to clean.
Common Mistakes to Avoid When Installing Basketball Parquet Flooring
While installing basketball parquet flooring is straightforward, there are several common mistakes that can hinder the quality and longevity of your floor. Avoid these pitfalls to ensure your installation is successful:
-
Neglecting subfloor preparation: Skipping steps to level and clean the subfloor can lead to poor adhesion and an uneven court surface.
-
Misaligned tiles: Incorrectly placed tiles can result in a crooked design. Always check for alignment as you work.
-
Rushing the drying process: Make sure the adhesive fully dries before using the court. Rushing this step can cause tiles to shift or detach.
-
Skipping protective coatings: Without proper finishing, the floor can wear down quickly. Applying a protective layer is essential for durability.
Maintaining Basketball Parquet Flooring for Longevity
Proper maintenance will extend the life of your basketball parquet flooring, ensuring it remains in excellent condition for years to come.
-
Regular cleaning: Sweep or vacuum the floor regularly to remove dirt and dust. Use a mild cleaning solution to wipe down the surface.
-
Avoid heavy furniture or equipment: Refrain from placing heavy objects on the floor to prevent unnecessary damage.
-
Spot repairs: If any tiles become damaged, replace them promptly to avoid further wear and tear.
Conclusion
Installing basketball parquet flooring like a pro is entirely achievable with the right tools, preparation, and attention to detail. By following the step-by-step guide above, you can create a durable, aesthetically pleasing court that will stand the test of time and provide players with an optimal experience.
Proper installation, along with regular maintenance, will keep your parquet flooring in top shape, ensuring that it remains a standout feature for years to come. Whether you’re upgrading your gymnasium or building a new court from scratch, basketball parquet flooring is a worthy investment for any serious athlete.